Snapchat Lens Studio - 2D Objects Template
This walkthrough is part of the Getting Started with Lens Studio series.
In this post, we’re going to look at the 2D Objects template in Lens Studio. This is a perfect place to get started in your journey into AR.
I’ve included a Tutorial Video below, but if you’d prefer a step by step guide, that’s here as well.
The first thing we’re going to do is open Lens Studio:
Next, in the templates section, find the 2D Objects Template. If you can’t see it straight away, either search for it or find it under the Beginner tab.
Ok, so now you’ve found the template, you can have a play around with anything in here. If you somehow break it or aren’t sure what you’ve done, you can close the file and re-open from the menu and everything will be back to how it was before.
So let’s get started and create a new lens.
In the Resources Panel bottom left, hit the + button at the top.
2. In the drop-down menu, hit the Import File button and find the 2D Assets File.
3. Next let’s look at the Objects Panel top left in your window. In Snap templates the pre-loaded assets will be in the Scene Panel already, usually indicated with a [REPLACE ME] tag. So we’re going to go ahead and delete these.
4. We’re going to hit the + button top left in the Objects Panel, this will bring up a drop-down menu with the options of all the components we can add to our effect. We’re going to add a Head Binding component to our main scene Camera.
5. Then once we’ve clicked on the Head Binding component we’ve just added, we’re going to hit the plus button again and add an Image Object (not a Screen Image!)
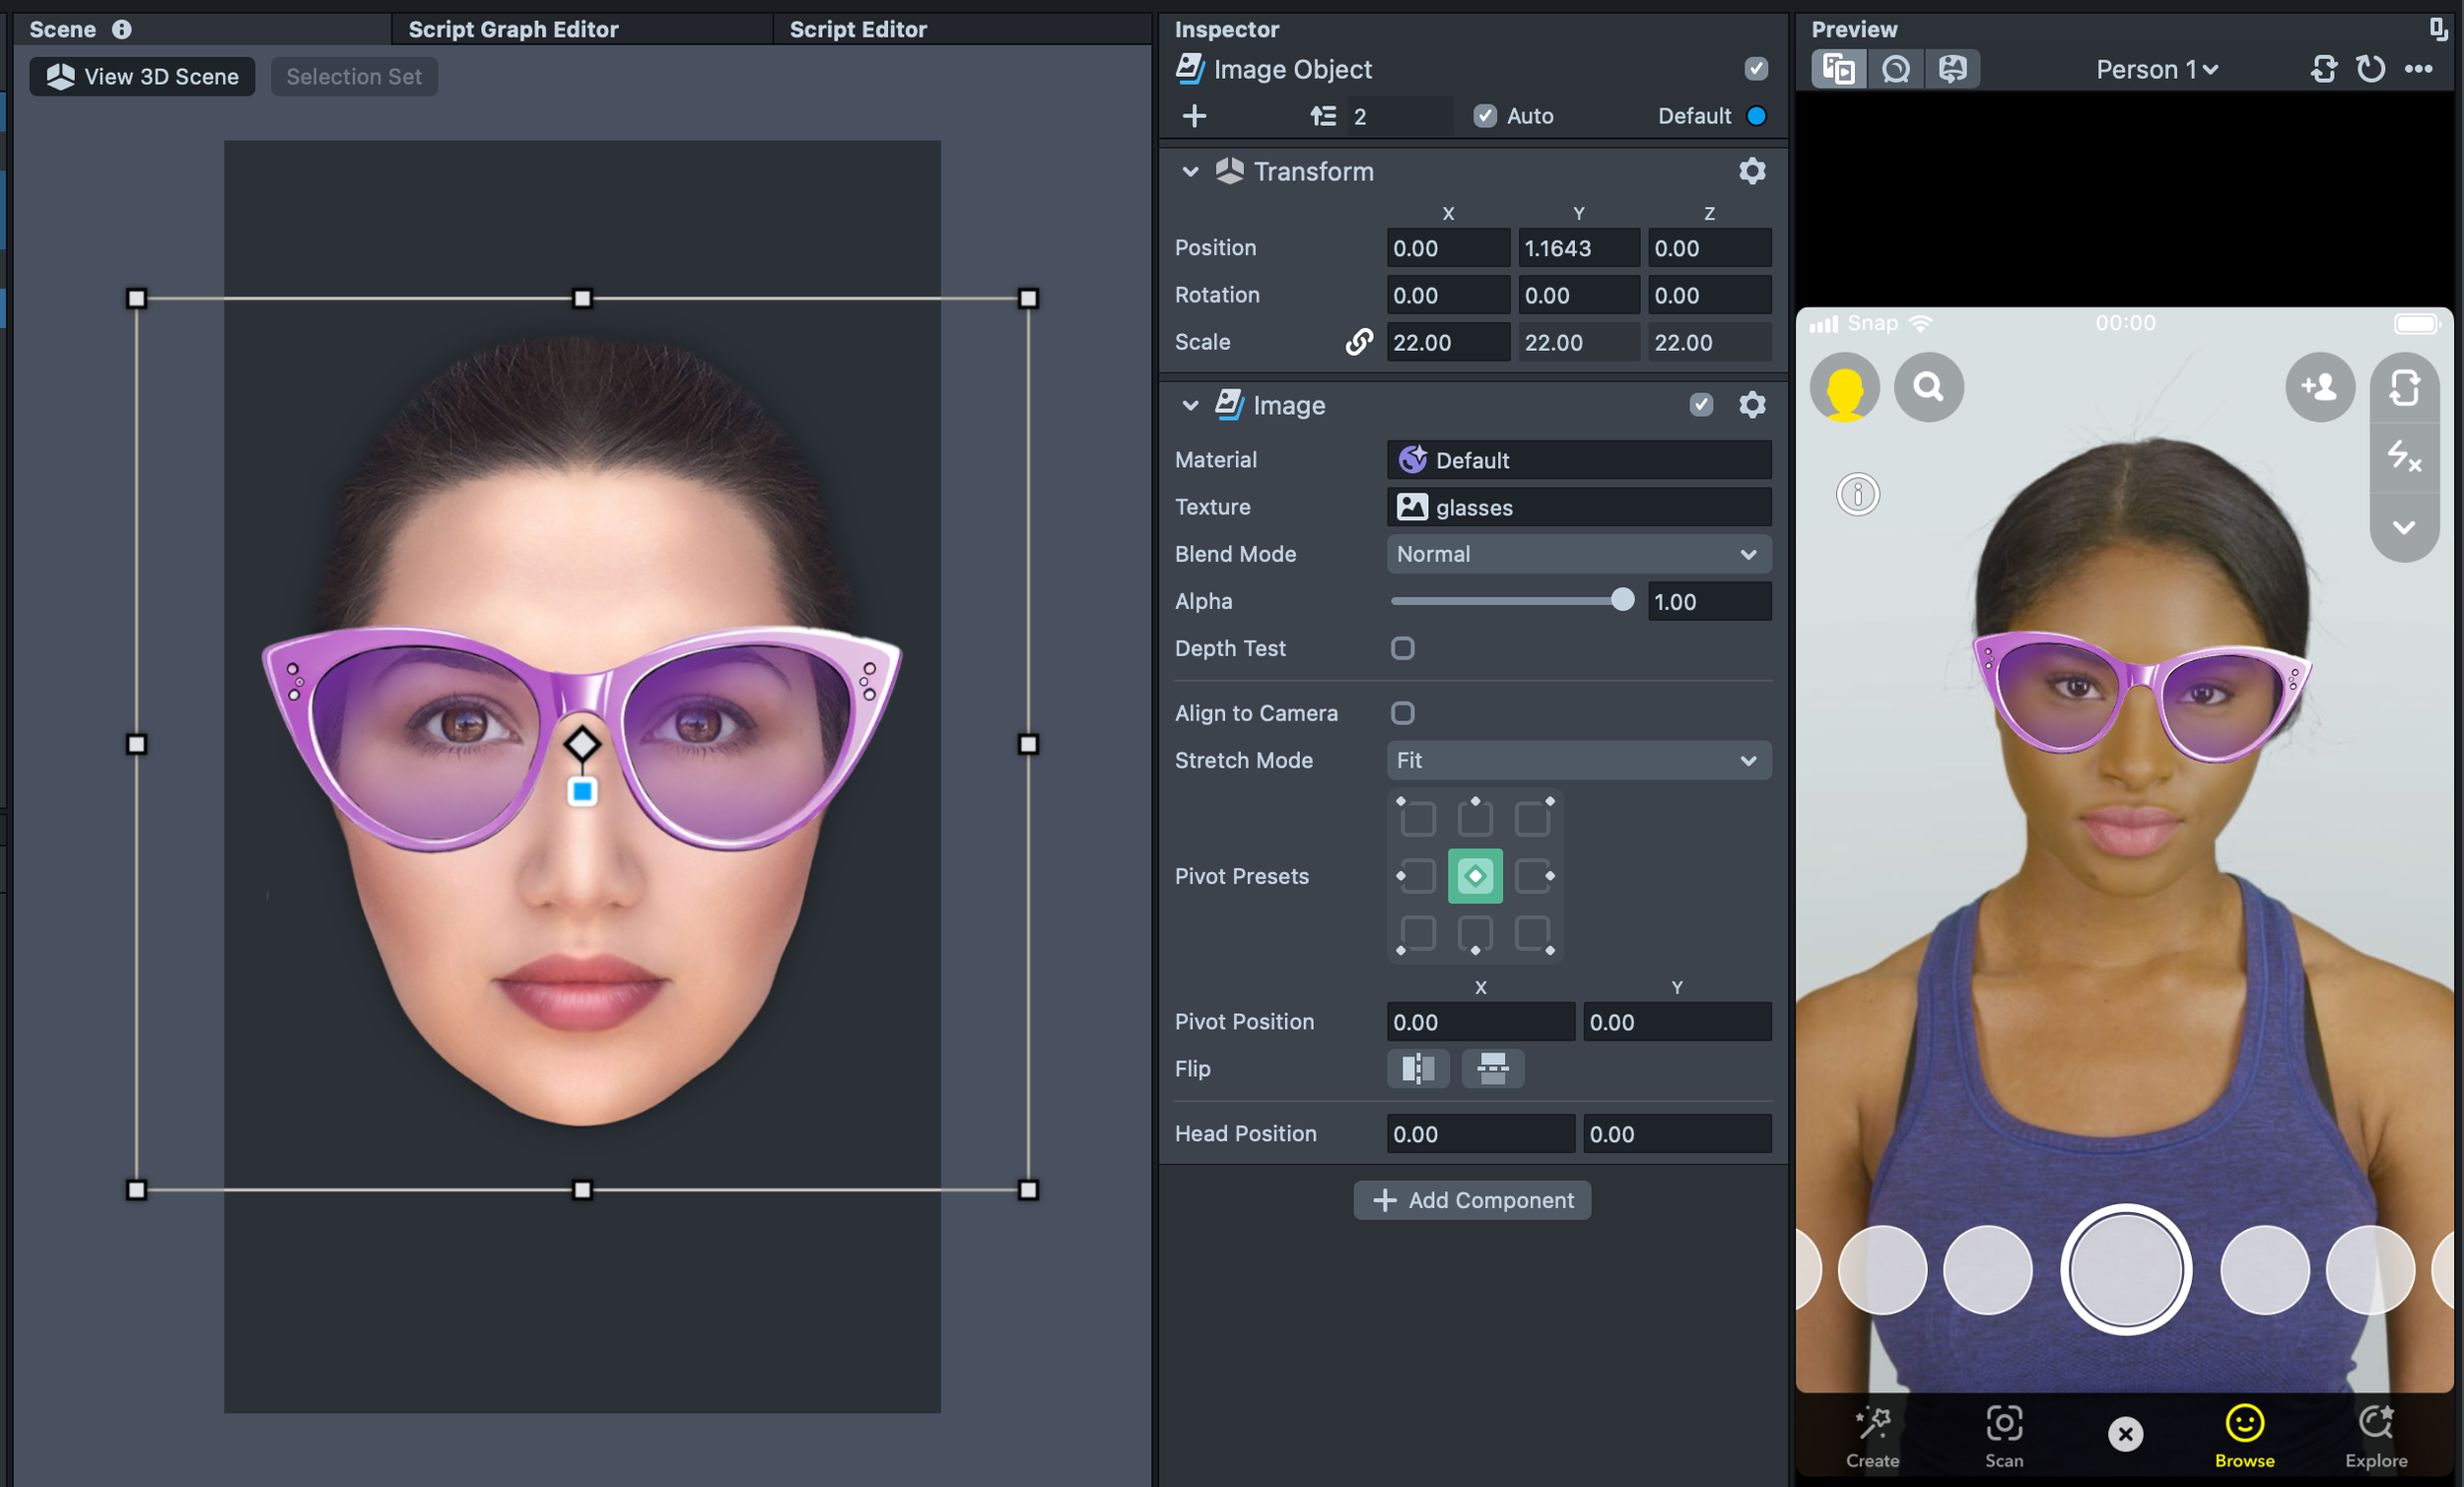
6. Once you’ve added the Image Object, we can start to adjust the properties in the Inspector Panel, this will be on the right hand side of your scene.
7. Under Texture in the Inspector panel, if you click on this you’ll get a pop up. From this we’re going to select the glasses first.
8. Once we’ve selected them we’re going to change the scale and Y-position in the Transform Panel which you can find at the top of the Inspector Panel to the right of the Scene
9. Once you’ve positioned and rescaled the glasses, let’s right click on the glasses and duplicate them. Rename the duplicated Image Object to Cat Ears.
10. Again head over to the inspector panel and swap the texture to Cat Ears
11. We need to head back over to the Objects panel now and drag the Cat Ears Object above the glasses object in order for it to sit behind the glasses. Now we can position and scale the cat ears to fit
12. Congratulations! You’re all done with modifying this lens. Why not grab some elements of your own and alter it further?
Thanks for following along with this tutorial, you’re now able to publish this lens or push to your device to test out.
See you in the next one! ✌🏼
File Link: Download the 2D files here


